The Ultimate Guide to Brick Repointing Techniques
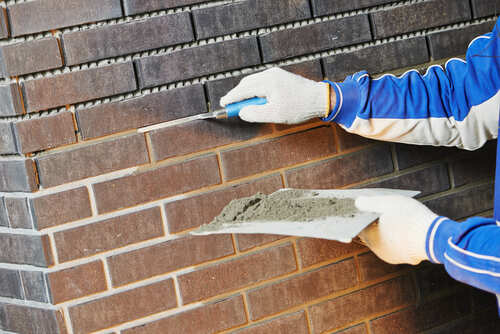
Brick repointing is an essential aspect of building maintenance that can significantly extend the lifespan of brick structures. Over time, weather conditions and natural wear can cause the mortar between bricks to deteriorate, leading to structural issues. Repointing involves the careful removal of deteriorated mortar and the application of new mortar to restore the integrity of the masonry. This guide delves into the techniques of brick repointing, providing insights and practical tips for achieving optimal results.
Understanding the Importance of Brick Repointing
Brick repointing is more than just a cosmetic fix. It plays a crucial role in maintaining the structural integrity and aesthetic appeal of a building. Neglecting repointing can lead to:
- Water penetration, resulting in damp problems and potential damage to internal structures.
- Increased risk of brickwork displacement due to weakened mortar.
- Reduced energy efficiency as gaps in mortar compromise insulation.
For more information on the significance of maintaining brick structures, find out more about this approach.
Essential Tools and Materials for Repointing
Gathering the right tools and materials is crucial for effective repointing. Here?s a list of essentials:
- Mortar Rake: To remove old mortar safely without damaging bricks.
- Pointing Trowel: For applying new mortar with precision.
- Mortar Mix: Choose a mix that matches the existing mortar in color and composition.
- Jointing Tool: To shape the mortar joints for a neat finish.
- Wire Brush: For cleaning the bricks before applying new mortar.
Learn about our tailored solutions for accessing quality tools and materials for repointing here.
Step-by-Step Guide to Brick Repointing
1. Assess the Damage
Before beginning repointing, assess the current state of the brickwork. Identify areas with loose or crumbling mortar, as these sections will require immediate attention. Explore advanced guides and tips for conducting a thorough assessment.
2. Preparation
Prepare the area by cleaning the bricks and removing any loose debris. Use a wire brush to ensure that the surface is ready for new mortar application.
3. Removing Old Mortar
Carefully remove the existing mortar using a mortar rake or a chisel. Ensure that the removal process does not damage the bricks. The depth of removal should be approximately twice the width of the joint.
4. Mixing New Mortar
Mix the new mortar, ensuring it matches the original in both color and texture for consistency. Proper mixing is crucial for durability and appearance.
5. Applying New Mortar
Using a pointing trowel, apply the new mortar into the joints. Work in small sections to prevent the mortar from drying out before shaping.
6. Finishing Touches
Use a jointing tool to shape the mortar joints, creating a smooth and consistent finish. Clean the bricks of any excess mortar to maintain a tidy appearance.
Discover expert strategies for finishing techniques here.
Conclusion
Proper brick repointing is a vital maintenance task that can preserve the structural integrity and aesthetic appeal of buildings. By following the outlined steps and utilizing the right tools and materials, repointing can be accomplished effectively and efficiently. For those seeking further guidance or professional services, learn about our tailored solutions to ensure high-quality results.
